「30日でできる!OS自作入門」をRustで。18日目
「30日でできる!OS自作入門 」のC言語の部分をできるだけRustですすめてみる。今回は18日目の内容。
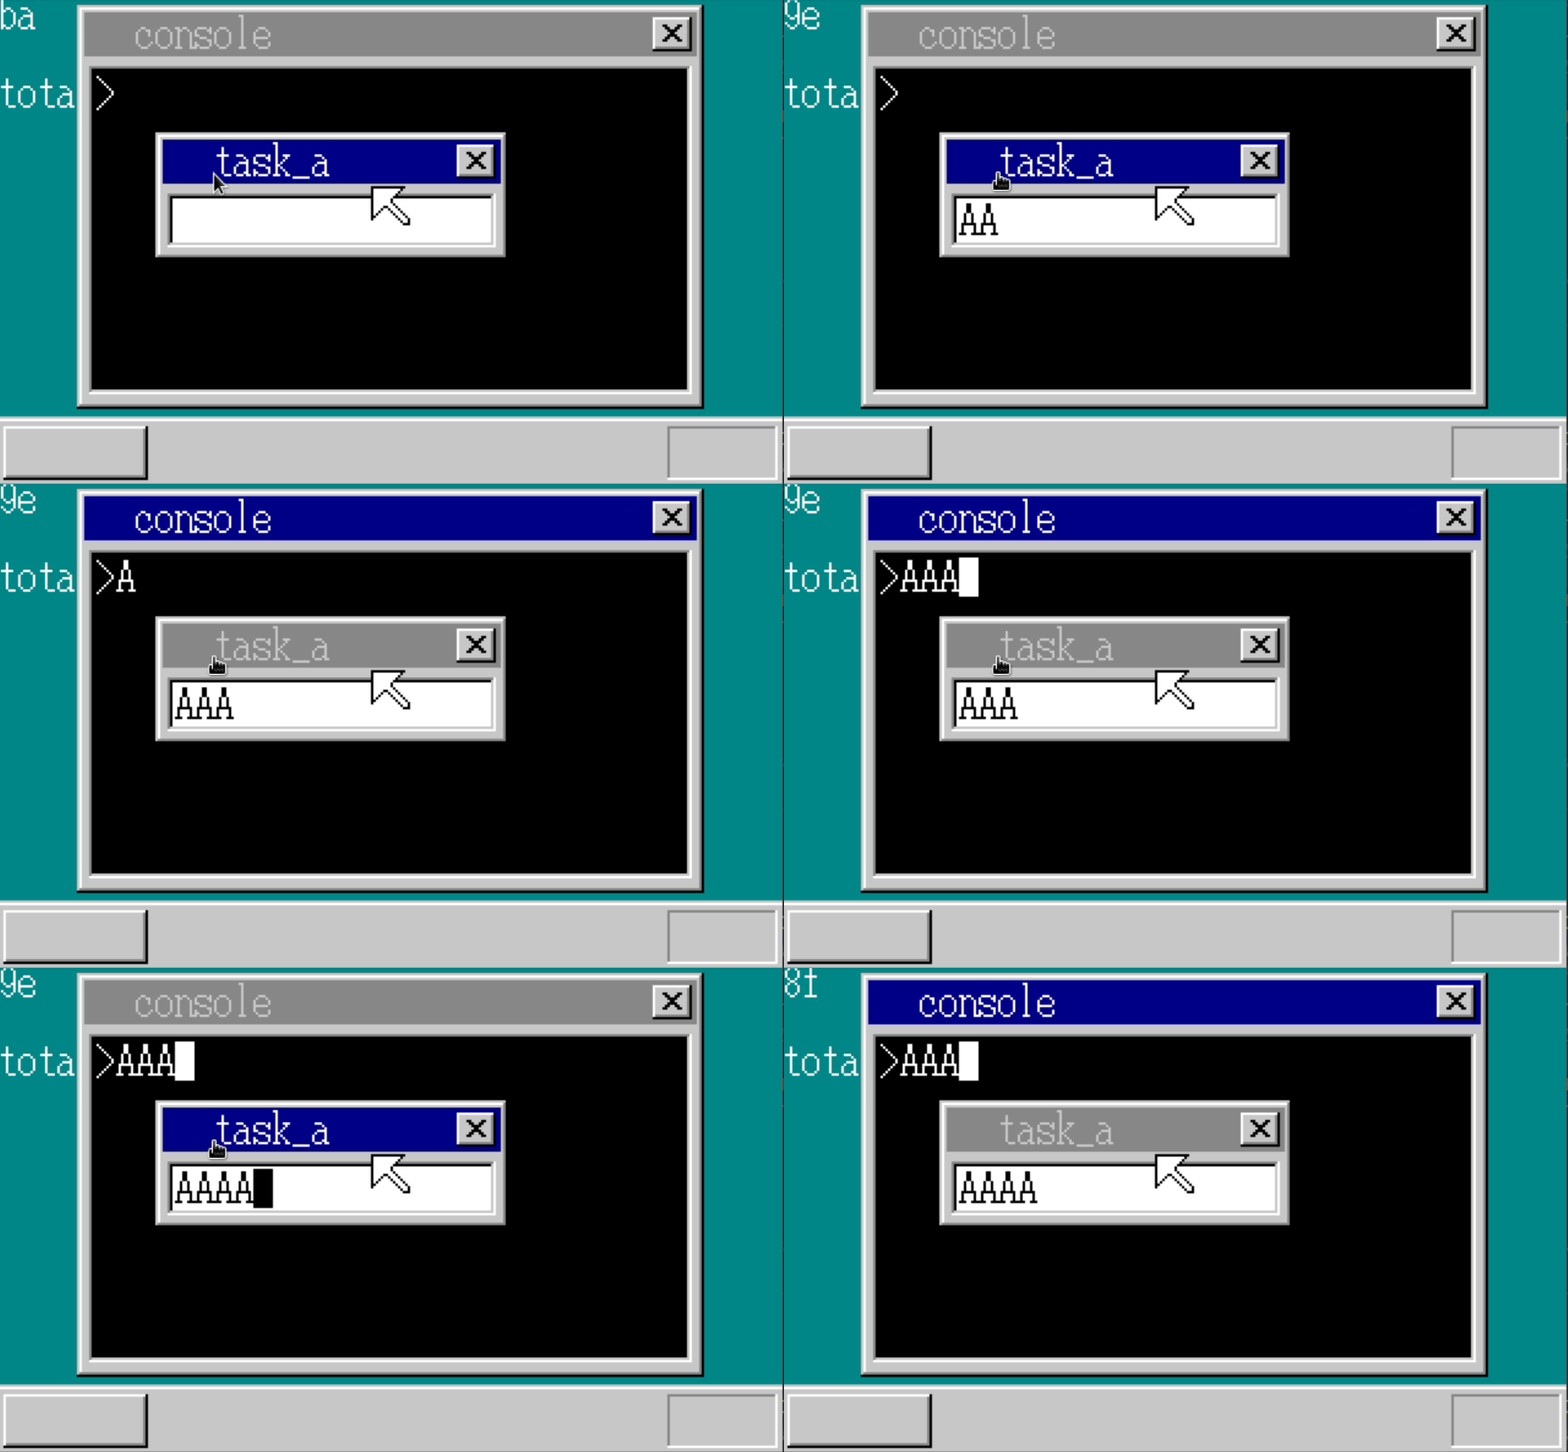
ウィンドウの非アクティブ時にはカーソルの点滅を止める
現在は両方のウィンドウのカーソルが常に点滅している状態なので、ウィンドウがアクティブかどうかで制御する。
// lib.rs
const CONSOLE_CURSOR_ON: u32 = 2;
const CONSOLE_CURSOR_OFF: u32 = 3;

#[no_mangle]
#[start]
pub extern "C" fn haribote_os() {
    // 省略
    let mut cursor_on = true; // カーソル点滅をONにするかどうか
    // 省略
    loop {
        // 省略
                // タブ
                if key == 0x0f {
                    // ...
                        // カーソルを消す
                        cursor_on = false;
                        // コンソールのカーソルを表示
                        let ctask = task_manager.tasks_data[console_task_index];
                        let fifo = unsafe { &*(ctask.fifo_addr as *const Fifo) };
                        fifo.put(CONSOLE_CURSOR_ON).unwrap();
                } else {
                    // ...
                        // カーソルを表示
                        cursor_on = true;
                        // コンソールのカーソルを消す
                        let ctask = task_manager.tasks_data[console_task_index];
                        let fifo = unsafe { &*(ctask.fifo_addr as *const Fifo) };
                        fifo.put(CONSOLE_CURSOR_OFF).unwrap();
                }
        // 省略
                if i != 0 {
                    TIMER_MANAGER.lock().init_timer(timer_index3, fifo_addr, 0);
                    cursor_c = if cursor_on {
                        Color::Black
                    } else {
                        Color::White
                    };
                } else {
                    TIMER_MANAGER.lock().init_timer(timer_index3, fifo_addr, 1);
                    cursor_c = Color::White;
                }
                TIMER_MANAGER.lock().set_time(timer_index3, 50);
                // cursor_on = trueのときのみ点滅
                if cursor_on {
                    boxfill(buf_win_addr, 144, cursor_c, cursor_x, 28, cursor_x + 8, 43);
                    sheet_manager.refresh(shi_win, cursor_x as i32, 28, cursor_x as i32 + 8, 44)
                }
// 以下省略
コンソールタスクの方にはfifo経由で渡すようにしている。 コンソールタスク側にも点滅制御ロジックがはいるが、同じなので省略する。
実行結果

Enterキーのハンドリング
Enterキーを入力されたときの処理を追加する。
コンソールウィンドウでのみ扱いたいため、コンソールウィンドウのタスク側にfifo経由で送る。
// lib.rs
const CONSOLE_ENTER: u32 = 10;

#[no_mangle]
#[start]
pub extern "C" fn haribote_os() {
    // 省略
                // Enterキー
                if key == 0x1c {
                    if active_window != 0 {
                        let ctask = task_manager.tasks_data[console_task_index];
                        let fifo = unsafe { &*(ctask.fifo_addr as *const Fifo) };
                        fifo.put(CONSOLE_ENTER + KEYBOARD_OFFSET).unwrap();
                    }
}コンソールタスク側ではCONSOLE_ENTERをうけとったら、Y座標を一文字分変えるようにする。
ウィンドウの最後までいった場合はスクロール処理をする。
//lib.rs
pub extern "C" fn console_task(sheet_index: usize) {
    // 省略
                    } else if key == CONSOLE_ENTER as u8 {
                        write_with_bg!(
                            sheet_manager,
                            sheet_index,
                            sheet.width,
                            sheet.height,
                            cursor_x,
                            cursor_y,
                            Color::White,
                            Color::Black,
                            1,
                            " "
                        );
                        if cursor_y < max_cursor_y {
                            cursor_y += 16;
                        } else {
                            // スクロール処理
                            for y in min_cursor_y..max_cursor_y {
                                for x in min_cursor_x..max_cursor_x {
                                    let x = x as usize;
                                    let y = y as usize;
                                    // 下の画素をコピーする
                                    let mut ptr = unsafe {
                                        &mut *((sheet.buf_addr + x + y * sheet.width as usize)
                                            as *mut u8)
                                    };
                                    *ptr = unsafe {
                                        *((sheet.buf_addr + x + (y + 16) * sheet.width as usize)
                                            as *const u8)
                                    }
                                }
                            }
                            for y in max_cursor_y..(max_cursor_y + 16) {
                                for x in min_cursor_x..max_cursor_x {
                                    let x = x as usize;
                                    let y = y as usize;
                                    // 最後の行は黒で埋める
                                    let mut ptr = unsafe {
                                        &mut *((sheet.buf_addr + x + y * sheet.width as usize)
                                            as *mut u8)
                                    };
                                    *ptr = Color::Black as u8;
                                }
                            }
                            sheet_manager.refresh(
                                sheet_index,
                                min_cursor_x as i32,
                                min_cursor_y as i32,
                                max_cursor_x as i32,
                                max_cursor_y as i32 + 16,
                            );
                        }
                        // プロンプト表示
                        write_with_bg!(
                            sheet_manager,
                            sheet_index,
                            sheet.width,
                            sheet.height,
                            8,
                            cursor_y,
                            Color::White,
                            Color::Black,
                            1,
                            ">"
                        );
                        cursor_x = 16;
                    } else {
                      // 省略
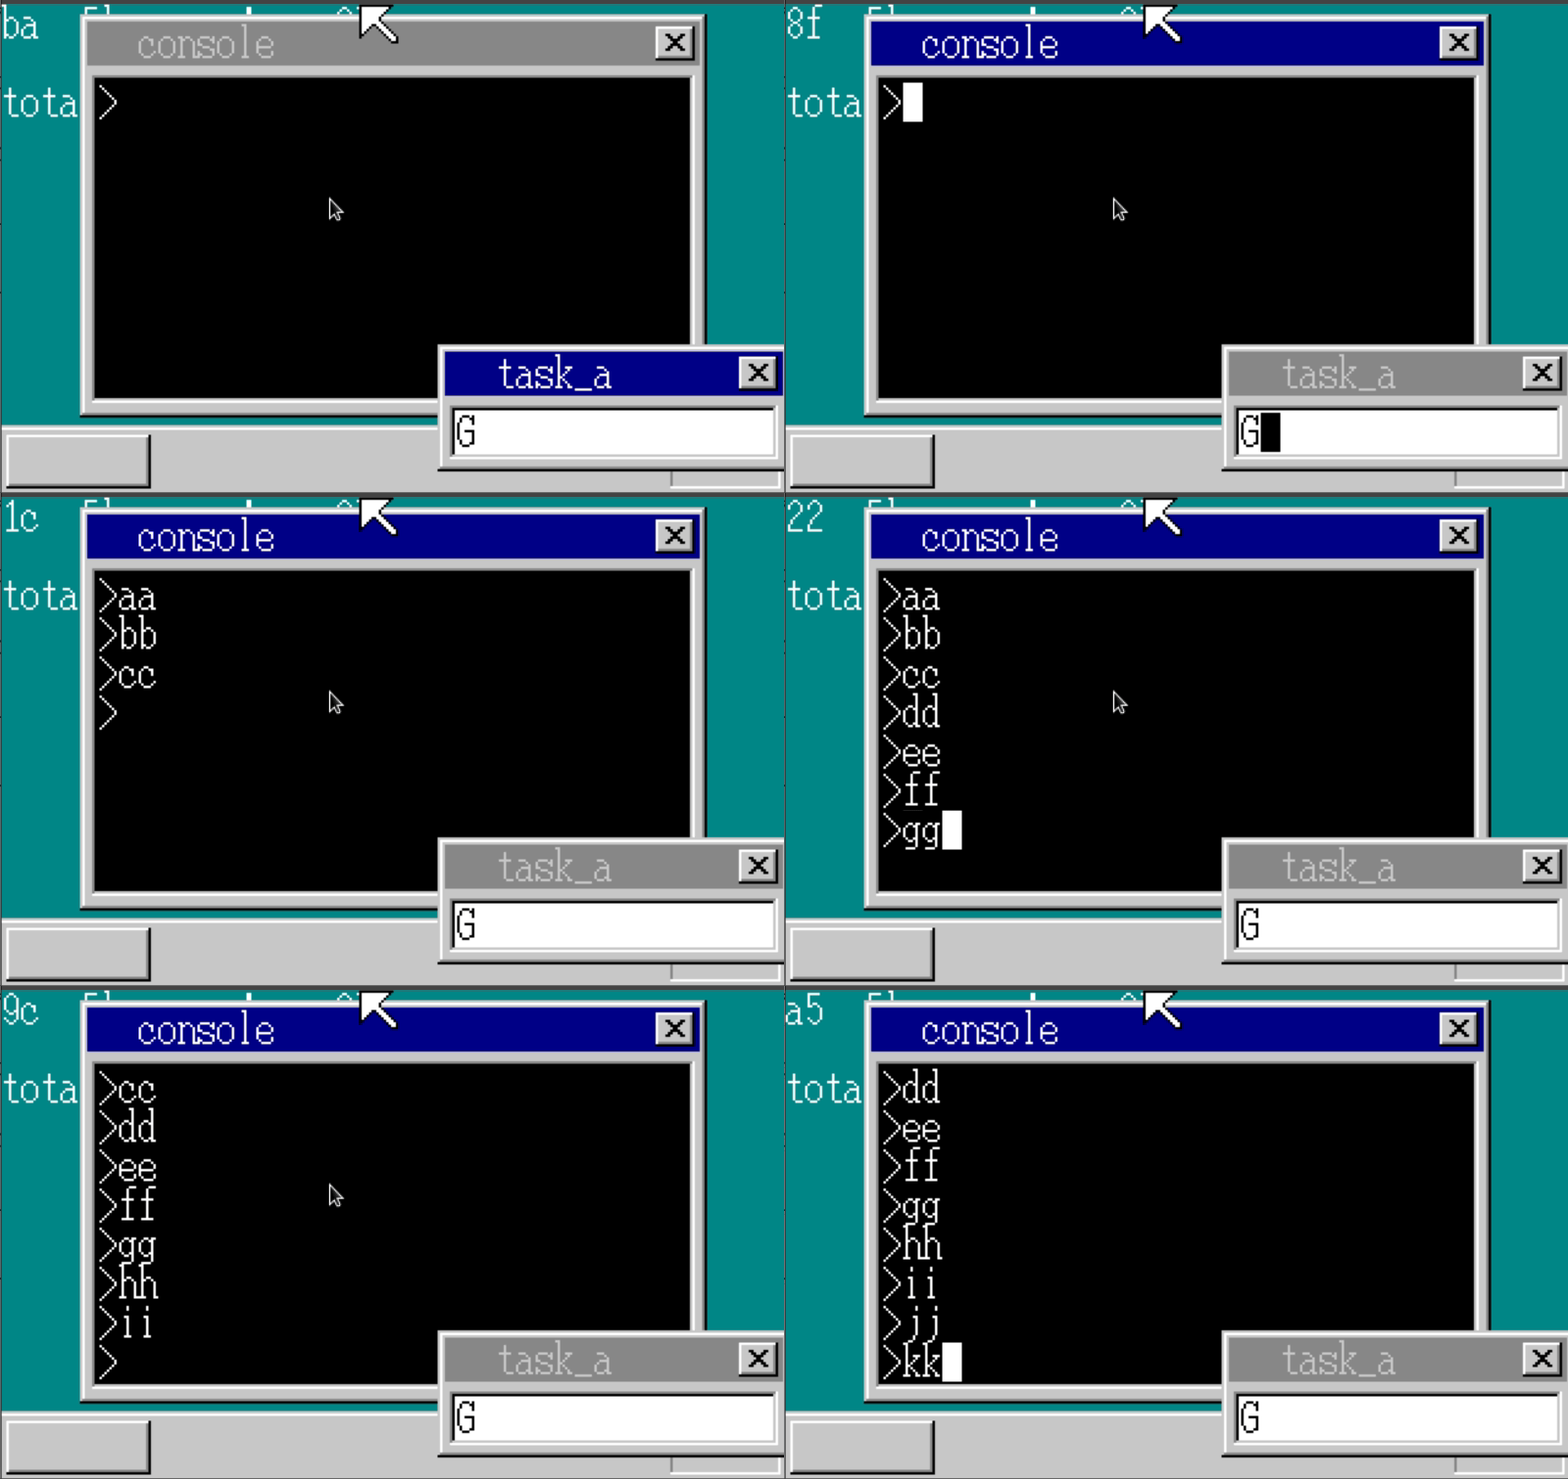
実行結果
以下の通り改行とスクロールができた。

memコマンドの実装
コンソール上でmemと入力することで、メモリの使用量を表示するようなコマンドを実装する。
実装にあたり、改行されるまでに入力された文字を格納していく配列をつくる。
尚、今後もコンソールにコマンドを追加していくようなので、console.rsという新しいファイルを作り、そちらにコンソールまわりはまとめることにした。
// console.rs
pub extern "C" fn console_task(sheet_index: usize, memtotal: usize) {
    // 省略

    // コマンドを保持するための配列
    let mut cmdline: [u8; 30] = [0; 30];

    loop {
    // 省略
} else if key == CONSOLE_ENTER as u8 {
                        write_with_bg!(
                            sheet_manager,
                            sheet_index,
                            sheet.width,
                            sheet.height,
                            cursor_x,
                            cursor_y,
                            Color::White,
                            Color::Black,
                            1,
                            " "
                        );
                        cursor_y = newline(cursor_y, sheet_manager, sheet_index);
                        cursor_y =
                            exec_cmd(cmdline, cursor_y, sheet_manager, sheet_index, memtotal);
                        cmdline = [0; 30];
                        // プロンプト表示
                        write_with_bg!(
                            sheet_manager,
                            sheet_index,
                            sheet.width,
                            sheet.height,
                            8,
                            cursor_y,
                            Color::White,
                            Color::Black,
                            1,
                            ">"
                        );
                        cursor_x = 16;
                    } else {
                        if cursor_x < MAX_CURSOR_X {
                            cmdline[cursor_x as usize / 8 - 2] = key;
                            write_with_bg!(
                                sheet_manager,
                                sheet_index,
                                sheet.width,
                                sheet.height,
                                cursor_x,
                                cursor_y,
                                Color::White,
                                Color::Black,
                                1,
                                "{}",
                                key as char,
                            );
                            cursor_x += 8;
                        }
} 改行処理をまとめたnewline、コマンド実行をまとめたexec_cmdという関数を追加する。
newlineは前述の処理をまとめただけなので、記載は省く。
// console.rs
fn exec_cmd(
    cmdline: [u8; 30],
    cursor_y: isize,
    sheet_manager: &mut SheetManager,
    sheet_index: usize,
    memtotal: usize,
) -> isize {
    let sheet = sheet_manager.sheets_data[sheet_index];
    let mut cursor_y = cursor_y;
    let cmd_ind = extract_cmd_index(cmdline);
    let cmd = core::str::from_utf8(&cmdline[cmd_ind.0..cmd_ind.1]).unwrap();
    if cmd == "mem" {
        let memman = unsafe { &mut *(MEMMAN_ADDR as *mut MemMan) };

        write_with_bg!(
            sheet_manager,
            sheet_index,
            sheet.width,
            sheet.height,
            8,
            cursor_y,
            Color::White,
            Color::Black,
            30,
            "total   {}MB",
            memtotal / (1024 * 1024)
        );
        cursor_y = newline(cursor_y, sheet_manager, sheet_index);
        write_with_bg!(
            sheet_manager,
            sheet_index,
            sheet.width,
            sheet.height,
            8,
            cursor_y,
            Color::White,
            Color::Black,
            30,
            "free {}KB",
            memman.total() / 1024
        );
        cursor_y = newline(cursor_y, sheet_manager, sheet_index);
        cursor_y = newline(cursor_y, sheet_manager, sheet_index);
    } else {
        write_with_bg!(
            sheet_manager,
            sheet_index,
            sheet.width,
            sheet.height,
            8,
            cursor_y,
            Color::White,
            Color::Black,
            12,
            "Bad Command"
        );
        cursor_y = newline(cursor_y, sheet_manager, sheet_index);
        cursor_y = newline(cursor_y, sheet_manager, sheet_index);
    }
    cursor_y
}

fn extract_cmd_index(cmdline: [u8; 30]) -> (usize, usize) {
    // 空白(32)、0はとばす
    let mut start: isize = -1;
    let mut end: isize = -1;
    for i in 0..cmdline.len() {
        if start < 0 {
            if cmdline[i] != 0 && cmdline[i] != 32 {
                start = i as isize;
                end = i as isize;
            }
        } else {
            end = i as isize;
            if cmdline[i] == 0 || cmdline[i] == 32 {
                break;
            }
        }
    }
    (
        (if start < 0 { 0 } else { start }) as usize,
        (if end < 0 { 0 } else { end }) as usize,
    )
}コマンド文字列を認識するために、空白や未入力の部分を省いた配列のインデックスを抽出するためのextract_cmd_indexという関数も追加している。(この処理は独自に追加した。)
実行結果
コンソール上にメモリ容量が表示できるようになった。

clear(cls) コマンドの追加
コンソールの表示をクリアするためのclearコマンドを追加する。
本中ではclsになっているが、自分はLinuxで実行しているため、せっかくなのでclearとする。
// console.rs
fn exec_cmd(
    // 省略
    } else if cmd == "clear" {
        for y in MIN_CURSOR_Y..(MAX_CURSOR_Y + 16) {
            for x in (MIN_CURSOR_X - 8)..MAX_CURSOR_X {
                let x = x as usize;
                let y = y as usize;
                let ptr =
                    unsafe { &mut *((sheet.buf_addr + x + y * sheet.width as usize) as *mut u8) };
                *ptr = Color::Black as u8;
            }
        }
        sheet_manager.refresh(
            sheet_index,
            (MIN_CURSOR_X - 8) as i32,
            MIN_CURSOR_Y as i32,
            MAX_CURSOR_X as i32,
            (MAX_CURSOR_Y + 16) as i32,
        );
        cursor_y = MIN_CURSOR_Y;
    } else {
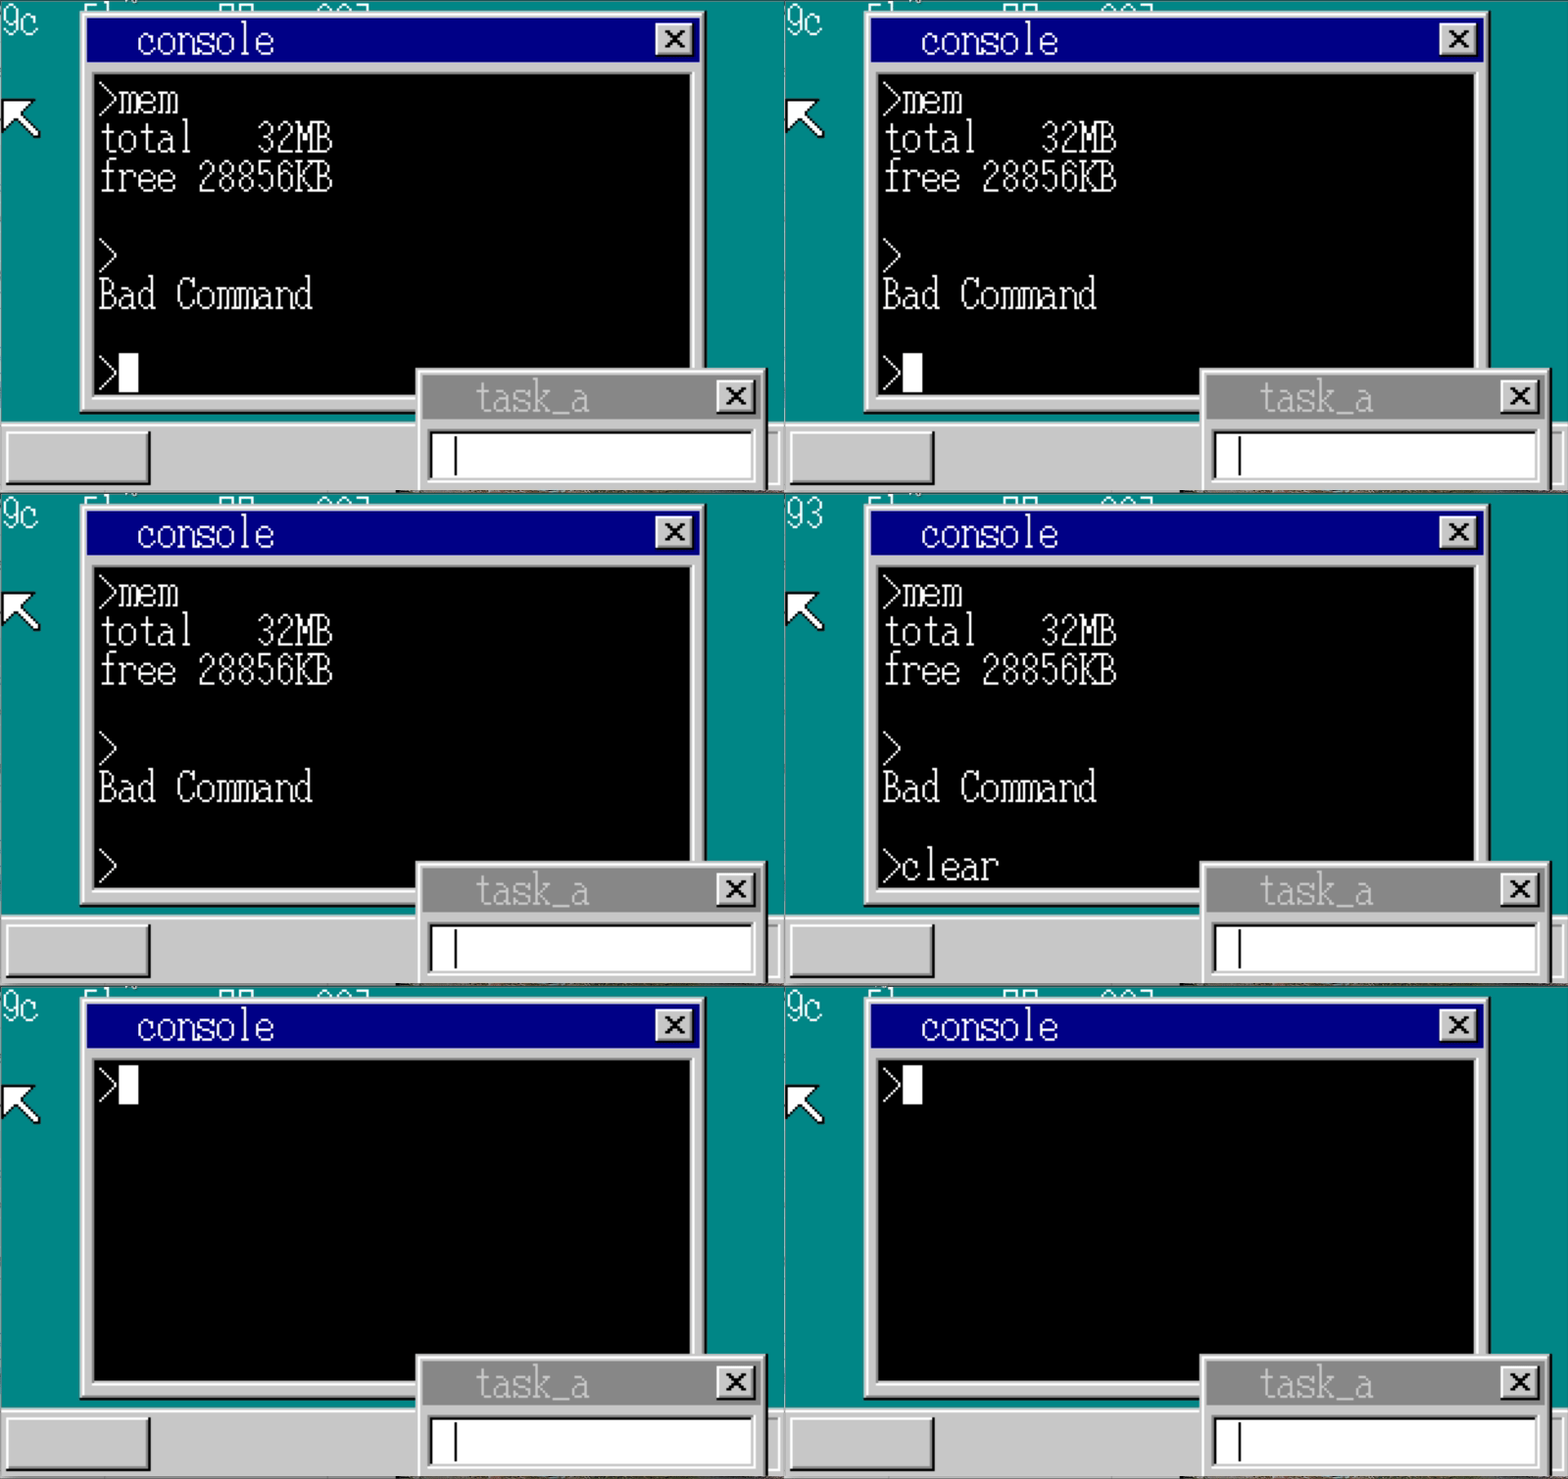
実行結果
画面がクリアできるようになったことがわかる。

ls(dir)コマンドの追加
ファイル情報の表示を行うコマンドを追加する。
ここでも本はdirとなっているが、lsとして実装する。
まずはファイル情報を読み込むためのstructと定数をfile.rsに定義しておく。
// file.rs
#[derive(Clone, Copy, PartialEq, Eq)]
#[repr(C, packed)]
pub struct FileInfo {
    pub name: [u8; 8],
    pub ext: [u8; 3],
    pub ftype: u8,
    pub reserve: [i8; 10],
    pub time: u16,
    pub date: u16,
    pub clustno: u16,
    pub size: u32,
}

pub const ADR_DISKIMG: usize = 0x00100000;
pub const ADR_FILE_OFFSET: usize = 0x002600;
pub const MAX_FILE_INFO: usize = 224;
これを使って、ファイル情報を読み込み、表示する。
// console.rs
fn exec_cmd(
    cmdline: [u8; 30],
    cursor_y: isize,
    sheet_manager: &mut SheetManager,
    sheet_index: usize,
    memtotal: usize,
) -> isize {
    // 省略
    } else if cmd == "ls" {
        for findex in 0..MAX_FILE_INFO {
            let finfo = unsafe {
                *((ADR_DISKIMG + ADR_FILE_OFFSET + findex * core::mem::size_of::<FileInfo>())
                    as *const FileInfo)
            };
            if finfo.name[0] == 0x00 {
                break;
            }
            if finfo.name[0] != 0xe5 {
                if (finfo.ftype & 0x18) == 0 {
                    write_with_bg!(
                        sheet_manager,
                        sheet_index,
                        sheet.width,
                        sheet.height,
                        8,
                        cursor_y,
                        Color::White,
                        Color::Black,
                        30,
                        "{:>8}.{:>3}   {:>7}",
                        from_utf8(&finfo.name).unwrap(),
                        from_utf8(&finfo.ext).unwrap(),
                        finfo.size
                    );
                    cursor_y = newline(cursor_y, sheet_manager, sheet_index);
                }
            }
        }
        cursor_y = newline(cursor_y, sheet_manager, sheet_index);
    } else {
表示確認のため、Makefileで適当なファイルをイメージに追加しておく。
$(IMG) : $(OUTPUT_DIR)/ipl.bin $(OUTPUT_DIR)/haribote.sys Makefile
	mformat -f 1440 -C -B $< -i $@ ::
	mcopy $(OUTPUT_DIR)/haribote.sys -i $@ ::
	mcopy src/lib.rs -i $@ ::   # <- 追加
	mcopy asm/ipl.asm -i $@ ::  # <- 追加
実行結果
以下の通り、ファイル情報が表示された。

18日目は以上となる。ここまでの内容のコードはyoshitsugu/hariboteos_in_rustのday18としてタグを打ってある。